Friday, December 16, 2011
A stack on the Arduino
I have put together a collection of Python scripts which allow me to build proper C++ programs for the Arduino Uno and Mega 2560 from the command line, and upload them all in one go. At the moment, these are only working in Linux but I think I know enough now that in principle I could get this going on Windows, possibly within Dev-C++ - a project for after Christmas, I think.
Wednesday, December 14, 2011
Home Made
I used to be really, really terrible at soldering things. Thank goodness for instructional videos on YouTube. The board was programmed by the method described in the previous post.
Bypassing the IDE
A colleague has objected, justifiably, that the Arduino can't be used for teaching C/C++ as it stands because of the way the environment works (hiding the main function, and confusing issues of scope, global variables, etc). Judging by a conversation I had this afternoon there is probably no money in the equipment budget to buy fifty of the things for next year's programming course anyway, but it would be nice to try. There are various tutorials on the web dealing with using the avr-gcc compiler directly, mainly reliant on using modified makefiles. The Arduino 1.0 release seems to have broken these (some of the files are now in different directories, some have disappeared), so I tried looking at the output if you ask the Arduino environment to give detailed output on compilation and upload (in File / Preferences).
Friday, December 9, 2011
Arduino classes
Underneath the Arduino programming environment is C++, but I didn't think I'd be trying to find my copy of Leendert Ammeraal's C++ for Programmers this Friday afternoon (I have Stroustrup, of course, but it's not a book to find a quick and easy solution in). I hooked up four of the RGB LED units to the Arduino Mega's 12 PWM pins, and wanted to implement a little algorithm I had run with one unit earlier in the week - set a random "target" value for the RGB values, gradually increase (or decrease) the intensity to reach the target, and then set a new random target. The effect is to gradually change the colour and intensity of each unit, but in a pleasant drifting manner rather than jumping around all over the place. Once I had written the code, I looked for ways to make it simpler - first using a struct, but there are difficulties writing functions for the Arduino which take a struct as a parameter (as I understand it, the pre-processor shuffles the code around so that your function ends up before the struct declaration, which means the compiler doesn't recognise the struct when it comes to compile the function). The answer was to go straight to writing a C++ class, which turned out to be fairly simple (though I did try writing a proper constructor function, and was reminded what a complete bloody nightmare that can be especially on a Friday afternoon in a very warm office when you haven't written any O-O C++ code for about a decade - once you start dabbling in constructors, you need to think hard about copy constructors, destructors, deep and shallow copies, all that stuff).
Arduino Mega and ethernet shield
I bought an Arduino Mega 2560 to reward myself for doing well in a philosophy module. To connect it to the ethernet shield, the solution in the Arduino forum works - connect pins 11, 12 and 13 on the ethernet shield to 51, 50 and 52 on the Mega (in that order, of course).
Edit: the Mega sorted out the problems I'd been having with getting a web server to read off the SD card - with the Arduino Uno it kept falling over and resetting the board, with the same code on the Mega I was able to run a slow, but quite usable, server.
Edit: the Mega sorted out the problems I'd been having with getting a web server to read off the SD card - with the Arduino Uno it kept falling over and resetting the board, with the same code on the Mega I was able to run a slow, but quite usable, server.
Thursday, December 8, 2011
Scrolling text with shift registers
Using a couple of 74HC595 shift registers, I have done away with most of the wires leading from the Arduino to the breadboard. This also simplifies the code - simply send a couple of bytes to the first shift register, and the data sorts itself out (the first byte is displaced by the second one and flows into the second shift register - I will probably add a third to the chain, to control the green LEDs). The text is now proportionally-spaced, rather than using 8 pixels per character.
Edit: adding a third shift register to the chain worked, but at the price of making the display rather dim (because of the time spent transferring all the data, I suspect). The green LEDs aren't as bright as the red ones, which made the effect worse - the red ones were just about acceptable.
Edit: adding a third shift register to the chain worked, but at the price of making the display rather dim (because of the time spent transferring all the data, I suspect). The green LEDs aren't as bright as the red ones, which made the effect worse - the red ones were just about acceptable.
Wednesday, December 7, 2011
Space invaders!
This is heavily adapted from the code on the Oomlout web site. I'm defining "sprites" called invader1, invader2 and blank, then in the loop() function I have an array of pointers to these sprites. There is an array led_state which stores the current state of the LED array, and at each cycle I am shifting every row rightwards and overwriting with the relevant portion of the next sprite. There is a lot of bit-masking and shifting going on. The next project is to replace the unwieldy wiring by using the shift register chips which are visible on the bottom right of the video - as described on the Arduino website.
Friday, December 2, 2011
Another web server
Still not much of a server - it is simply sending back the same page whatever the client requests. But I have set it up so that the values of the three potentiometers change the colour of the background of the page, and it displays the values of the temperature sensor and light sensor. Apologies for the blurriness of some of this - the Flip camera doesn't do close-ups very well (or maybe I haven't worked out how to make it do close-ups).
My own web server
This is adapted to some extent from the web server and SD code examples. As with the web server example, this is currently interpreting any HTTP request as GET / HTTP/1.1 - the twist is that it is reading index.htm from the SD card, and serving that. If it can't open and read index.htm, it sends a 404 response. I've also written a function which reads in the request headers one line at a time, and the server then prints them to the serial console (a little like the error log on a full-sized server, and I'm intending to try to use that information later on).
Thursday, December 1, 2011
Arduino web server
Considering I had no experience using these things this morning (although I read Massimo Banzi's Getting Started with Arduino while on strike yesterday), I think this is pretty good.
LED matrix
What the life of man is like in the state of nature according to Thomas Hobbes. I had to make minor modifications to the code (renaming a variable from A3 to A33), but this is entirely from http://oomlout.com/LEDMS including the wiring. I am impressed that I managed to wire it all up correctly first time, though.
Hobbes's life was none of these things, of course.
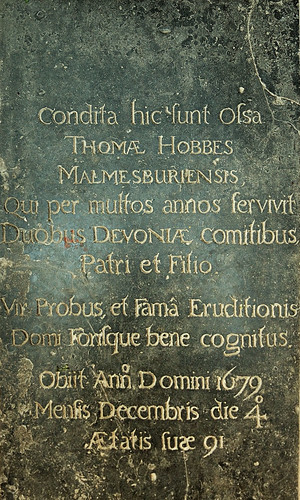
Here are buried the bones of Thomas Hobbes of Malmesbury who for many years served the two Earls of Devonshire, father and son. A sound man and well known at home and abroad for the renown of his learning. He died in the year of our lord 1679 on the 4th day of the month of December in the 91st year of his age.
Here are buried the bones of Thomas Hobbes of Malmesbury who for many years served the two Earls of Devonshire, father and son. A sound man and well known at home and abroad for the renown of his learning. He died in the year of our lord 1679 on the 4th day of the month of December in the 91st year of his age.
Arduino
Not the most impressive program I have ever written, but considering the Arduino only arrived this morning it's not a bad start (I also have an 8x8 LED array which I will be playing around with later). Setting up the Arduino development environment on Linux was simple: downloaded and unzipped the IDE, installed the gcc-avr and avr-libc packages, and added myself to the dialout group (sudo usermod -aG dialout nja) as described on this page. [Edit: on my home netbook, running Ubuntu 11.10 rather than Linux Mint, I had to edit /hardware/arduino/cores/arduino/wiring.h and comment out the line starting #define round (line 79), as described here]
const int RED_LED = 9;
const int AMBER_LED = 10;
const int GREEN_LED = 11;
const int ON = 0xFF;
const int OFF = 0x00;

void setup()
{
  pinMode(RED_LED, OUTPUT);
  pinMode(GREEN_LED, OUTPUT);
  pinMode(AMBER_LED, OUTPUT);
}

void loop()
{
  analogWrite(AMBER_LED, OFF);
  analogWrite(RED_LED, ON);
  delay(1000);
  analogWrite(AMBER_LED, ON);
  delay(1000);
  analogWrite(RED_LED, OFF);
  analogWrite(AMBER_LED, OFF);
  analogWrite(GREEN_LED, ON);
  delay(1000);
  analogWrite(AMBER_LED, ON);
  analogWrite(GREEN_LED, OFF);
  delay(1000);
}
Thursday, November 24, 2011
grub customizer
Useful tool if you're going to have several operating systems on one machine (found here).
sudo add-apt-repository ppa:danielrichter2007/grub-customizer
sudo apt-get update
sudo apt-get install grub-customizer
Friday, November 18, 2011
LabVIEW licenses
Just a little thing, but while installing a fresh version of LabVIEW on my netbook (to test an installation package for students) the license manager was showing full licenses for products I had removed - a nuisance, as I was trying to take screenshots to show the students what they could expect to see. I thought I had rummaged sufficiently through the registry and deleted enough files for that not to happen. Turns out Microsoft have moved the location of application setting files in Windows 7, and the license files were lurking in
C:\ProgramData\National Instruments\License Manager\Licenses
C:\ProgramData\National Instruments\License Manager\Licenses
Tuesday, November 15, 2011
IE and Google Search
For some reason (which I am absolutely positive will not be connected with the fact that Microsoft wants you to use Bing), Google doesn't show up in the UK when you search for alternative search providers. Here's a direct link.
http://www.iegallery.com/en/addons/detail.aspx?id=813
http://www.iegallery.com/en/addons/detail.aspx?id=813
Thursday, November 10, 2011
Login wallpaper
One of the first things most people do with a new computer is change the wallpaper. Both Ubuntu 11.10 and Windows 7 also allow you to change the wallpaper for the login screen (both of these will need to be done using administrator rights, of course).
Windows 7:
Interestingly, after fiddling around with various wallpapers, I have ended up with the Linux login wallpaper being a dark blue version of the Windows desktop wallpaper, and vice-versa:


The orange Linux wallpaper is a macro photo of a nectarine, and the light blue Windows wallpaper is the water rushing by the Poole harbour ferry.
Windows 7:
- Start the group policy editor (gpedit.msc).
- Go to Computer Configuration / Administrative Templates / System / Logon
- Enable "Always use custom logon background".
- Create the directory C:\Windows\System32\oobe\info\backgrounds if it doesn't already exist.
- Put the desired login wallpaper in that directory, with the name backgroundDefault.jpg. This will need to be 256kb or less.
Ubuntu:
- Put the desired image file somewhere where the LightDM greeter (the program which handles logging in and out) can see it. Because your home directory may not be accessible to the greeter before you log in (mine isn't, which caused a problem with the Simple LightDM Manager program which insists on copying wallpaper files to your home directory), this should ideally be somewhere like /usr/share/backgrounds.
- Edit /etc/lightdm/unity-greeter.conf to include the line
background=/usr/share/backgrounds/your-background.jpg


The orange Linux wallpaper is a macro photo of a nectarine, and the light blue Windows wallpaper is the water rushing by the Poole harbour ferry.
Wednesday, November 9, 2011
Linux Mint
What counts as hot news in the Linux world: Linux Mint has overtaken Ubuntu in the DistroWatch page hits chart. Probably because Mint has retained a GUI (Gnome 2) which users find more familiar than Ubuntu's Unity or Gnome 3, both of which are controversial departures from the "launch bar plus programs menu" style. Personally, I like Gnome 3 very much on a netbook, I'm not convinced that it's the best way of doing things on a larger screen (my feeling is that there is a false assumption in both GUIs that you will basically be doing one thing at a time, so it is not obvious what is running behind the currently active window, and switching between running applications is not as simple as a single mouse click - that may sound a trivial objection, but if you're used to these things being obvious and quick, even a trivial barrier is irritating). So last night I put Linux Mint on my home netbook - which took about half an hour including freeing up some disk space, downloading the ISO file, plus maybe twenty minutes this morning to download and install updates (a similar process putting Windows 7 on the work netbook took several hours with half a dozen reboots and the usual scrabbling around to find the right network driver - this for a machine which came with Windows 7 installed in the first place). One hiccup: booting from the live USB drive just gives the error message:
The answer, as usual, came within a couple of minutes by googling the first line. Hit tab, and then enter "live" to boot as normal and install into the ten gigabyte partition (two thirds of which is still free - another contrast with Windows 7).
Irritation number one: when I start a terminal, I see this before the command prompt:
This is the sort of thing that gets Linux a reputation as the operating system for people who think fantasy fiction is a guide to life. I have nothing against fantasy fiction (it's not for me, but each to their own), but I don't see why I should be subjected to some geek's idea of profundity every time I want to use bash. I do not care what "Corwin, Prince of Amber" thinks about any subject. The way to remove it is here - but why on earth is it set up as the default in an operating system which presumably wants to attract at least a few users who don't feel the urge to dress up as hobbits at weekends?
Irritation number two: when restoring the boot loader so that Ubuntu was still the default, the Fedora wallpaper reappeared. It looks like this:

Many years ago I went to a conference on using the web for university education (in the days when that was a new and slightly wacky idea). "You can always tell a university website", we were told, "because the logo and the button graphics were designed by a physics professor rather than a graphic designer". Universities are mostly over the stage of trusting design to academic staff, and Linux is getting better, but there are still plenty of graphic elements which were obviously "designed" by a programmer who fancied they had artistic talent, rather than someone with actual artistic talent. The solution to this one was chmod -x /etc/grub.d/05_debian_theme and then update-grub; grub-install /dev/sda (both run as root, of course). I think the wallpaper was installed when I installed Gnome 3 (why should installing a desktop GUI also mean I want to change the boot loader wallpaper?). I wouldn't have minded quite so much if it had been Ubuntu-branded wallpaper (I know Ubuntu is a derivative of Debian, but it is a different operating system).
vesamenu.c32: Not a COM32R image
boot:
The answer, as usual, came within a couple of minutes by googling the first line. Hit tab, and then enter "live" to boot as normal and install into the ten gigabyte partition (two thirds of which is still free - another contrast with Windows 7).
Irritation number one: when I start a terminal, I see this before the command prompt:
 ________________________________________
/ Steady movement is more important than \
| speed, much of the time. So long as    |
| there is a regular progression of      |
| stimuli to get your mental hooks into, |
| there is room for lateral movement.    |
| Once this begins, its rate is a matter |
| of discretion.                         |
|                                        |
\ -- Corwin, Prince of Amber             /
 ----------------------------------------
  \
   \   \_\_    _/_/
    \      \__/
           (oo)\_______
           (__)\       )\/\
               ||----w |
               ||     ||
This is the sort of thing that gets Linux a reputation as the operating system for people who think fantasy fiction is a guide to life. I have nothing against fantasy fiction (it's not for me, but each to their own), but I don't see why I should be subjected to some geek's idea of profundity every time I want to use bash. I do not care what "Corwin, Prince of Amber" thinks about any subject. The way to remove it is here - but why on earth is it set up as the default in an operating system which presumably wants to attract at least a few users who don't feel the urge to dress up as hobbits at weekends?
Irritation number two: when restoring the boot loader so that Ubuntu was still the default, the Fedora wallpaper reappeared. It looks like this:

Many years ago I went to a conference on using the web for university education (in the days when that was a new and slightly wacky idea). "You can always tell a university website", we were told, "because the logo and the button graphics were designed by a physics professor rather than a graphic designer". Universities are mostly over the stage of trusting design to academic staff, and Linux is getting better, but there are still plenty of graphic elements which were obviously "designed" by a programmer who fancied they had artistic talent, rather than someone with actual artistic talent. The solution to this one was chmod -x /etc/grub.d/05_debian_theme and then update-grub; grub-install /dev/sda (both run as root, of course). I think the wallpaper was installed when I installed Gnome 3 (why should installing a desktop GUI also mean I want to change the boot loader wallpaper?). I wouldn't have minded quite so much if it had been Ubuntu-branded wallpaper (I know Ubuntu is a derivative of Debian, but it is a different operating system).
Tuesday, November 8, 2011
Netbook
The Department recently bought me a netbook - the HP Mini 110-3704sa (and a two gigabyte RAM upgrade). It came with Windows 7 Starter, which was removed within half an hour - it is now dual-booting Ubuntu Linux 11.10 and Windows 7 Professional. I've had an older HP Mini (running only Linux) for a couple of years and found myself increasingly bringing it in to work because it was so useful. I've been using the Windows installation more than I thought, mainly because of Office 2010 (not ideal, due to the "looking through a letterbox" screen dimensions, but usable - pop-up forms present a more serious problem, with the "Submit" button sometimes being off the bottom of the screen with no way to reach it other than tabbing through the fields and guessing when to stop).
One of the first things I do with any new PC is set up a web server on it - even on a netbook. I have (or had) an ugly combination of PHP and Perl which allowed me to set up lists of links, which can be updated through a web form. Having the dual-boot machine made me wonder about setting up the servers on the two operating systems to look at the same CGI and HTML directories. The first thing I did was to translate the Perl CGI script into Python, which is the programming language I'm most comfortable using these days.
I installed Apache 2.2.21 on Windows, then PHP 5.3.8 (many web pages say use the VC6-compiled version, I used the VC9 build, thread-safe version). The MSI install didn't work, I used the zip file to put it directly into C:\Program Files\PHP5. I then added these lines to Apache's httpd.conf file:
LoadModule php5_module "C:/Program Files/PHP5/php5apache2_2.dll"
AddHandler application/x-httpd-php .php
PHPIniDir "C:/Program Files/PHP5"
With PHP now working, I fiddled around for a while trying to work out a way for the same Python CGI script to be run under both Windows and Linux. There is a way - described here.
I then decided that it was better to rewrite the whole thing in PHP, which made most of the above completely unnecessary.
One of the first things I do with any new PC is set up a web server on it - even on a netbook. I have (or had) an ugly combination of PHP and Perl which allowed me to set up lists of links, which can be updated through a web form. Having the dual-boot machine made me wonder about setting up the servers on the two operating systems to look at the same CGI and HTML directories. The first thing I did was to translate the Perl CGI script into Python, which is the programming language I'm most comfortable using these days.
I installed Apache 2.2.21 on Windows, then PHP 5.3.8 (many web pages say use the VC6-compiled version, I used the VC9 build, thread-safe version). The MSI install didn't work, I used the zip file to put it directly into C:\Program Files\PHP5. I then added these lines to Apache's httpd.conf file:
LoadModule php5_module "C:/Program Files/PHP5/php5apache2_2.dll"
AddHandler application/x-httpd-php .php
PHPIniDir "C:/Program Files/PHP5"
With PHP now working, I fiddled around for a while trying to work out a way for the same Python CGI script to be run under both Windows and Linux. There is a way - described here.
- Keep the Linux "shebang line". This is the main problem - with scripts and interpreted programs, Unix systems use the first line of a file to determine what sort of thing it is, as opposed to the Windows method of using the file extension. Apache by default behaves that way even on Windows systems. The Linux shebang line is #!/usr/bin/python, and the Windows shebang line would be #!C:\Python27\python.exe - but you can't have both.
- In httpd.conf again, enter these lines:
ScriptInterpreterSource registry
PassEnv PYTHONPATH
SetEnv PYTHONUNBUFFERED 1 - Change the name of the script to include the .py extension (which should be already linked to Python).
I then decided that it was better to rewrite the whole thing in PHP, which made most of the above completely unnecessary.
Wednesday, February 16, 2011
Distance
I think I have pretty conclusively shown that getting distance out of the accelerometers and the motionplus is not going to work. What might work is using the IR camera - I now have a "sensor bar", which contains no sensors and is essentially a couple of banks of LEDs about 20cm apart (three at each end of the bar, spaced by about 1cm). I haven't dismantled it, but I suspect they are just bright LEDs with an infra-red filter in front of them (you can see the actual LEDs by pointing a phone camera at them). The code below checks whether two spots are visible, and if so it works out the apparent distance between them. When the wiimote is close to the sensor bar, it is able to resolve the individual LEDs so it may pick up more than two spots - a metre away seems to be the "safe" distance where the two groups of three LEDs look like two large infra-red sources.
What we have found is that this works pretty well for distance measurements - placing the sensor bar on a desk and the wiimote on another desk a couple of metres away results in a stable measurement of the apparent separation between the two sources, and moving the wiimote a fairly short distance gives a change in this apparent separation which is also consistent and could be translated into a distance from the sensor bar with about 1cm accuracy (i.e. moving the wiimote forward or back about 1cm causes a change in the apparent separation of one camera pixel). For example, with d = 1m the apparent separation might be 160 pixels, and with d=1.1m the separation might be 150 pixels (apparently closer together, because the light sources are further away). With some calibration, and the selection of alternative light sources and positions, this could be used to give accurate position measurement.

What we have found is that this works pretty well for distance measurements - placing the sensor bar on a desk and the wiimote on another desk a couple of metres away results in a stable measurement of the apparent separation between the two sources, and moving the wiimote a fairly short distance gives a change in this apparent separation which is also consistent and could be translated into a distance from the sensor bar with about 1cm accuracy (i.e. moving the wiimote forward or back about 1cm causes a change in the apparent separation of one camera pixel). For example, with d = 1m the apparent separation might be 160 pixels, and with d=1.1m the separation might be 150 pixels (apparently closer together, because the light sources are further away). With some calibration, and the selection of alternative light sources and positions, this could be used to give accurate position measurement.

#!/usr/bin/python

import cwiid
from time import sleep
from math import sqrt

print "Press 1+2 on the Wiimote now"
wiimote = cwiid.Wiimote()
wiimote.rumble = 1
sleep(0.2)
wiimote.rumble = 0
print "OK"

# Rumble to indicate a connection
wiimote.enable(cwiid.FLAG_MESG_IFC)
wiimote.rpt_mode = cwiid.RPT_BTN | cwiid.RPT_IR

loop = True
distance = 0
last_distance = 0
last_ir = ""

while (loop):
    sleep(0.01)
    messages = wiimote.get_mesg()
    for mesg in messages:
        # Button:
        if mesg[0] == cwiid.MESG_BTN:
            if mesg[1] & cwiid.BTN_HOME:
                print "Ending Program"
                loop = False
        # Infra-red
        elif mesg[0] == cwiid.MESG_IR:
            sources = mesg[1]
            output = "IR:  "
            spots = []
            for spot in sources:
                if spot:
                    # output = output + "{0}".format(spot)
                    output = output + \
                        "{0} {1:12}".format(spot["size"], spot["pos"])
                    spots.append(spot)
            if len(spots) == 2:
                deltax = spots[0]["pos"][0] - spots[1]["pos"][0]
                deltay = spots[0]["pos"][1] - spots[1]["pos"][1]
                distance = int(sqrt(deltax * deltax + deltay * deltay))
                if distance != last_distance:
                    print "Distance : ", distance
                    last_distance = distance
            else:
                if output != last_ir:
                    print output
                    last_ir = output
        else:
            print mesg
Subscribe to:
Posts (Atom)