A Raspberry Pi arrived late last week, just before I came away for the bank holiday. So I bought a cheap USB keyboard, checked that an old iPod power supply coupled with a Kindle cable would provide enough oomph (just about), and took the lot to my mother's. Unfortunately the keyboard (PC World Essentials) turned out to be one which won't work. Also, I can't keep coming to my mother's house every time I want access to a TV with an HDMI socket. Here's how I got access to the board via my laptop, which runs both Windows and Ubuntu Linux 12.04 - instructions are for the latter, and while I think the instructions below could be adapted for Windows they would probably be more complex. In any case, if you're going to be doing things with an ARM board running Linux, why wouldn't you also be running Linux on your other machines?
- Enable SSH. I paid for an SD card pre-loaded with Debian. Stick the card in the laptop, rename boot_enable_ssh.rc to boot.rc, and put the card back into the Pi before powering up.
- Plug the Pi into one of the ports on the back of the wireless router. Using a web browser on the laptop, go to the router's management page and look up the list of attached devices. I found that the Pi was on 192.168.0.3.
- Open a command prompt on the laptop, and do "ssh pi@192.168.0.3". Password is "raspberry", and you should be logged on to the Pi.
- Update packages: sudo apt-get update followed by sudo apt-get upgrade.
- Install a VNC server: sudo apt-get install tightvncserver.
- Run the server: tightvncserver - you'll be asked to set a password.
- Start a VNC server with a resolution that will fit in your monitor - I used vncserver :1 -geometry 800x600 -depth 24
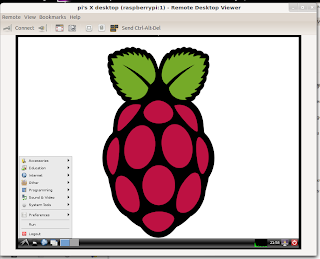
- On the laptop, run vinagre, a VNC client, and choose to connect to 192.168.0.3:1 via VNC - the password you will be asked for is the one you set in step 6, not the password from step 3.
- An LXDE desktop should appear:
